Campervan Conversions Explained: Panel Van to Dream Home on Wheels
Complete guide to campervan conversions. Costs, base vehicles, layouts and what makes a quality conversion. Caledonian Tourers.
Your Rolling Sanctuary: The Definitive Guide to Campervan Conversions in the UK
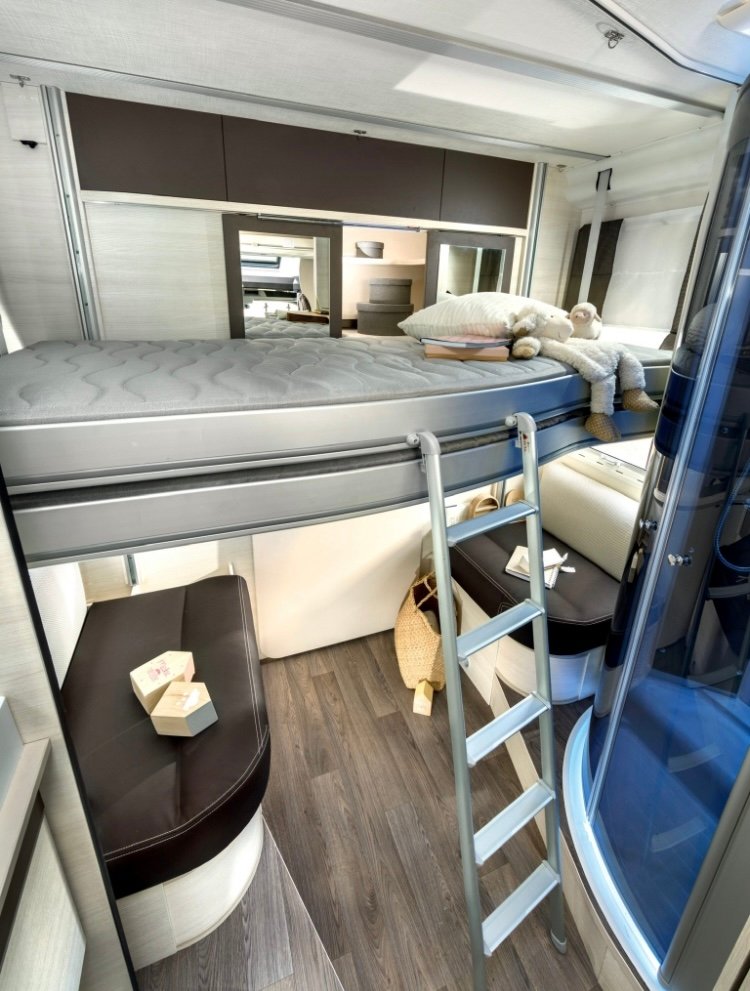
In the romantic tapestry of Scottish landscapes, from the brooding majesty of Glencoe to the serene whispers of the Outer Hebrides, there's a growing desire to embrace the open road, to wake to new vistas, and to truly live life on your terms. For many, this dream finds its ultimate expression not in a factory-built behemoth, but in the crafting of a bespoke sanctuary – a campervan conversion. At Caledonian Tourers, we've seen countless commercial vans reborn into incredible homes on wheels, and we're here to share our extensive knowledge to guide you through every rivet, every wire, and every decision on your journey to creating your perfect rolling abode.
Forget the generic 'how-to's; this isn't just about fitting a bed and a hob. This is about understanding the soul of a campervan conversion, the nuances of UK regulations, the hidden costs, and the sheer joy of a project that truly connects you to your vehicle. Whether you're eyeing a rusty old Transit or a pristine Sprinter, preparing to sell your existing campervan, or looking to browse campervans for sale that have already undergone this magical transformation, this comprehensive guide is for you.
The 'Why' Before the 'What': Unearthing Your Campervan Conversion Vision
Before you even glance at a van for sale, the most crucial step is to define your "why." This isn't just hypothetical; it dictates every single decision, from the base vehicle to the insulation thickness. Are you a solo adventurer planning to wild camp around the North Coast 500, needing minimal fuss but maximum insulation for those brisk Scottish nights? Or are you a family of four envisioning summer holidays at campsites like the award-winning Sands Caravan & Camping Park in Gairloch, requiring dedicated sleeping zones, a robust kitchen, and perhaps a small dinette?
- Solo Explorer: Focus on simplicity, single bed, portable cooking, ample storage for gear (bikes, kayaks). A small, stealthy van like a VW Caddy Maxi or a short-wheelbase Transit Custom could be ideal.
- Couple's Retreat: Fixed double bed, compact kitchenette, perhaps a small seating area. Medium-wheelbase (MWB) vans like a Ford Transit, Vauxhall Vivaro, or even a larger VW Transporter T5/T6 often fit the bill.
- Family Adventures: Multi-berth sleeping arrangements (bunks, pop-top bed), larger kitchen, proper wash facilities (cassette toilet, wet room). Long-wheelbase (LWB) or extra-long-wheelbase (XLWB) vans such as a Mercedes Sprinter, Fiat Ducato, or Peugeot Boxer become strong contenders.
- Remote Worker/Digital Nomad: Prioritise robust power systems (solar, large leisure battery bank), dedicated workspace, reliable internet connectivity, and climate control. Insulating properly here is paramount for year-round comfort.
Understanding your primary use will prevent costly mistakes and ensure your investment of time and money yields a functional, joyful space. This foundational clarity is key to a successful campervan conversion.
Choosing Your Canvas: The Base Vehicle Battlefield
This is where the rubber meets the road – literally. The choice of base vehicle is arguably the most impactful decision in your campervan conversion journey. Don't fall prey to aesthetics alone; delve into reliability, parts availability, and driveability.
Popular UK Base Vehicles for Campervan Conversions:
- VW Transporter (T4, T5, T6): The perennial favourite, synonymous with the classic campervan image.
- Pros: Excellent resale value, strong aftermarket support, feels car-like to drive, fits under most height barriers.
- Cons: High price point (especially for T5/T6), internal width can be restrictive for a fixed transversal bed unless you're short, payload can be tight.
- Typical Conversion Cost (mid-range DIY): £5,000 - £15,000 (excluding professional pop-top).
- Ford Transit Custom: A surging contender, offering modern comforts and often better value than a Transporter.
- Pros: Great to drive, modern safety features, often cheaper to insure and maintain than VWs, good payload.
- Cons: Fewer aftermarket 'camper' accessories than VW, internal height can be limited for standing (unless H2).
- Typical Conversion Cost (mid-range DIY): £4,000 - £12,000.
- Citroen Relay / Peugeot Boxer / Fiat Ducato: The 'triplets' –
these large panel vans share the same body and mechanicals.
- Pros: Excellent internal width for transversal fixed beds (even for taller individuals), high roof options for full standing height, often excellent value, good payload.
- Cons: Can feel more 'van-like' to drive, often lack the car-like refinement of smaller vans.
- Typical Conversion Cost (mid-range DIY): £6,000 - £18,000 (can go much higher for luxury builds).
- Mercedes Sprinter / VW Crafter (pre-2017 models): The larger, premium end of the panel van spectrum.
- Pros: Renowned for reliability (Sprinter), ample space, high payload, comfortable for long drives.
- Cons: Higher initial purchase price, can be more expensive for parts and servicing.
- Typical Conversion Cost (mid-range DIY): £7,000 - £20,000+.
- Vauxhall Vivaro / Renault Trafic / Nissan Primastar: Another popular triplet.
- Pros: Good balance of size and driveability, often good value, comfortable cab.
- Cons: Internal width can be tight for a fixed bed, some earlier models had gearbox issues.
- Typical Conversion Cost (mid-range DIY): £4,500 - £13,000.
When inspecting a potential base vehicle, service history is paramount. Look for rust, particularly around wheel arches, sills, and door seams. Check the floor of the cargo area for significant damage or signs of heavy loads. A pre-purchase inspection by a trusted mechanic is highly recommended – an extra £100 could save you thousands down the line. Remember, a good foundation is vital for your campervan conversion.
The Build Process: An Expert's A-Z of Your Campervan Conversion
1. Design & Planning (The Blueprint of Your Dream)
This is where your vision translates into technical drawings. Use online tools like SketchUp or even graph paper. Measure everything meticulously. Think about workflow: where will you cook? Where will your gear go? Consider the 'zone' approach: cooking zone, sleeping zone, living zone. Factor in UK legal requirements for windows and ventilation, and consider future additions like an awning. Don't rush this; it's the most important phase of a robust campervan conversion. Many experienced converters spend weeks or even months here.
2. Strip-Out & Cleaning (Starting with a Clean Slate)
Remove all existing panels, bulkhead, and flooring. Clean the interior thoroughly, using degreaser for any oil stains. Address any rust spots immediately – grind them back, treat with rust converter (like Bilt Hamber Hydrate 80), and prime/paint. This preventative step is crucial for longevity, especially in Scotland's damp climate.
3. Window & Vent Installation (Light, Air, and Safety)
Cutting holes in your new van is daunting, but essential. Use quality tools: a jigsaw with metal blades for windows, and a hole saw for smaller vents. Always measure thrice, cut once! Seal religiously with Sikaflex or similar marine-grade sealant. For roof vents, consider a Maxxair Fan for excellent airflow, which is a game-changer for ventilation and moisture control – vital for preventing dampness in a campervan conversion.
4. Insulation & Vapour Barrier (Your Comfort Zone)
This is non-negotiable for year-round comfort in the UK.
- Walls & Ceiling: Recycled plastic bottle insulation (e.g., ThermaWrap, Celotex/Kingspan cut to fit cavities) combined with Dacron insulation is popular. Mineral wool can be used but needs careful sealing to prevent moisture absorption. Avoid expanding foam unless you're a pro; it can cause bodywork distortion.
- Floor: 25-50mm rigid foam board (Celotex/Kingspan) directly onto the metal floor, with battens to create a level subfloor base.
- Vapour Barrier: A full vapour barrier (e.g., reflective bubble foil or 6-mil plastic sheeting) is critical to prevent condensation from soaking your insulation. Tape all seams carefully with foil tape. This is often overlooked but separates a good campervan conversion from a damp one.
5. Wiring & Electrics (The Heartbeat of Your Camper)
Unless you're a qualified auto electrician, this is an area where professional help is highly recommended. Incorrect wiring is dangerous and can void insurance.
- Components: Leisure battery (AGM or Lithium - LiFePO4 for serious charging), split charge relay (e.g., Victron Cyrix-Li-Ct) or DC-DC charger (e.g., Victron Orion-Tr Smart) for charging from the alternator, solar panel(s) with MPPT controller, 240V hook-up with RCD/MCB consumer unit, inverter for AC appliances, control panel, fuse box.
- Cables: Use appropriately sized automotive-grade cables for each circuit. Fuse everything.
- Planning: Map out every wire run and appliance location before installing insulation. Leave 'pull strings' in place for future additions.
6. Plumbing & Water Systems (Essential for Off-Grid Living)
Again, tailored to your needs.
- Fresh Water: 25-70L tank recommended for weekend trips. Submersible or diaphragm pump, inline filter, tap. Consider an external fill point.
- Grey Water: Collection tank (usually under the van) or external waste hog. Never just dump grey water!
- Hot Water: Options range from simple kettles to electric immersion heaters or gas-powered Truma/Alde systems (requiring professional gas installation).
- Toilet: Portable chemical toilet, composting toilet, or a fixed cassette toilet if space allows.
7. Gas Installation (Safety First!)
If you're using gas for cooking or heating, this must be installed by a Gas Safe registered engineer. Seriously, do not attempt this yourself. They will issue a Gas Safety Certificate, which is often required by insurance companies and for future resale. This is not just a suggestion; it's a legal and safety imperative for a legitimate campervan conversion.
8. Walls, Ceiling & Floor (The Interior Finish)
- Walls/Ceiling: Thin plywood (e.g., 6mm or 9mm birch ply) or lightweight tongue-and-groove cladding. Paint or veneer to your taste.
- Floor: Plywood subfloor over your insulation and battens, then choose your finish – vinyl plank, laminate, or even durable carpet tiles.
9. Cabinetry & Furniture (Maximising Space & Functionality)
This is where design vision really comes alive. Lightweight plywood (poplar or marine ply) is ideal. Use piano hinges for strength, push-button latches to prevent doors flying open while driving, and good quality drawer runners. Custom-built units utilise every inch; flat-pack can be adapted but often requires significant modification. Think multi-functional: a bench that becomes a bed, a table that folds away.
10. Bed Design (Your Sleep Sanctuary)
Crucial for comfort. Options include:
- Fixed Bed: Permanent structure, often over a "garage" area for storage.
- Convertible Bed: Seating area converts into a bed (e.g., rock-n-roll bed, U-shaped lounge).
- Pop-Top Bed: Creates an upper sleeping area, often for children or occasional use.
11. Finishing Touches & Accessories (Personality & Practicality)
Curtains/blinds, LED lighting, USB charging ports, fridge (compressor fridges are more efficient than thermoelectric), small wood burner (professional installation only), external shower point, bike rack, awning. These are the details that make your campervan conversion truly yours.
The All-Important Paperwork & Legalities for Your Campervan Conversion
Once your DIY campervan conversion is complete, you MUST inform the DVLA of the change of body type to 'Motor Caravan'. This is crucial for insurance, MOT, and resale. The criteria can be vague, but generally, your vehicle needs to demonstrate it is "permanently fitted with camping facilities." This usually means:
- Two or more of the following permanently fitted to the living accommodation:
- Sleeping accommodation (at least a bed).
- Cooking facilities (a fixed hob or microwave).
- Storage facilities (cupboards).
- One table (fixed or detachable).
- Seating facilities (at least one lounge or seat).
- A minimum internal height to allow an adult to stand upright (less critical for smaller vans like Transporters converted with pop-tops).
- An awning or awning rail.
- Distinctive motor caravan body shape (e.g., side windows, non-standard roof).
Document your build with photos at every stage – this is invaluable evidence for the DVLA. Being registered as a motor caravan can significantly reduce insurance premiums and may allow you to bypass certain speed restrictions that apply to commercial vans. Check with various insurers, as some are more camper-friendly than others. Look at specialist brokers like Comfort Insurance or Adrian Flux. Don't overlook this step for your campervan conversion.
Cost Considerations: Beyond the Van
We've touched on individual costs, but let's break down the overall picture for your campervan conversion:
- Base Van: £5,000 (older, higher mileage) to £30,000+ (newer, low mileage).
- Tools: Expect to spend £500-£1,500 on essential tools if you don't already own them (jigsaw, drill, riveter, saw, clamps etc.).
- Insulation & Panels: £500 - £2,000 depending on materials and size.
- Electrics (DIY): £1,000 - £4,000 (battery, solar, chargers, wiring, lights). Professional installation can add £1,500 - £4,000+.
- Plumbing: £200 - £800 (tanks, pump, tap, sink).
- Gas (Professional): £300 - £800 (installation, certificate, components).
- Furniture & Fittings: £1,000 - £5,000 (materials, hinges, latches, mattress, cushions).
- Appliances: £300 - £1,500 (fridge, hob, oven if desired).
- Windows & Vents: £200 - £1,000+.
- Miscellaneous: £500 - £2,000 (sealants, glues, screws, paint, décor).
Total DIY conversion costs typically range from £5,000 to £20,000+ on top of the van’s purchase price. Professional conversions can start from £15,000 for a basic fit-out on a small van and easily exceed £50,000 for a high-end large van. The sky's the limit, really, for a bespoke campervan conversion.
Selling Your Masterpiece, Or Buying One Ready-Made?
Once you've poured your heart and soul into a campervan conversion, the thought of selling might seem distant. However, when the time comes to upgrade, or if you're looking to sell your campervan with us, a well-documented and legally compliant conversion will fetch a much better price. Highlight the quality of materials, the professional installations (electrics, gas), and the DVLA classification.
Conversely, if the thought of building one yourself feels too daunting, you could always explore browse campervans for sale. We have a selection of excellent pre-converted vans available, ranging from compact Edinburgh campervans perfect for city breaks and Highland adventures, to larger, family-friendly options great for exploring the Scottish coast near Glasgow or the wilderness around Perth.
If you're a professional converter looking to streamline your sales, our dealer/trader packages offer significant advantages, connecting your incredible builds with eager buyers.
Your Journey Starts Here
The road to a completed campervan conversion is challenging, rewarding, and deeply personal. It's a journey of learning new skills, problem-solving, and ultimately, creating a space that perfectly reflects your nomadic spirit. From the initial spark of an idea to the first night spent under the stars in your self-built haven, every step builds towards an unparalleled sense of accomplishment.
We hope this in-depth guide has provided you with the expert analysis and practical advice you need to embark on your own campervan conversion. Whether you're planning your first build, looking to hire one before you buy (check out our guides on Campervan Hire Edinburgh Guide or Motorhome Guide Glasgow), or ready to take the plunge and purchase a ready-to-roll home, we at Caledonian Tourers are here to support your adventures. Don't hesitate to get in touch with our friendly team in Perth for advice, sales, or hire – your open road awaits!
Caledonian Tourers — luxury motorhome & campervan hire in Scotland & England, plus the UK's largest campervans-for-sale marketplace (900+ cities) and a curated roof tents UK shop. Family-run from Perth since 2019. Email enquiries: [email protected].